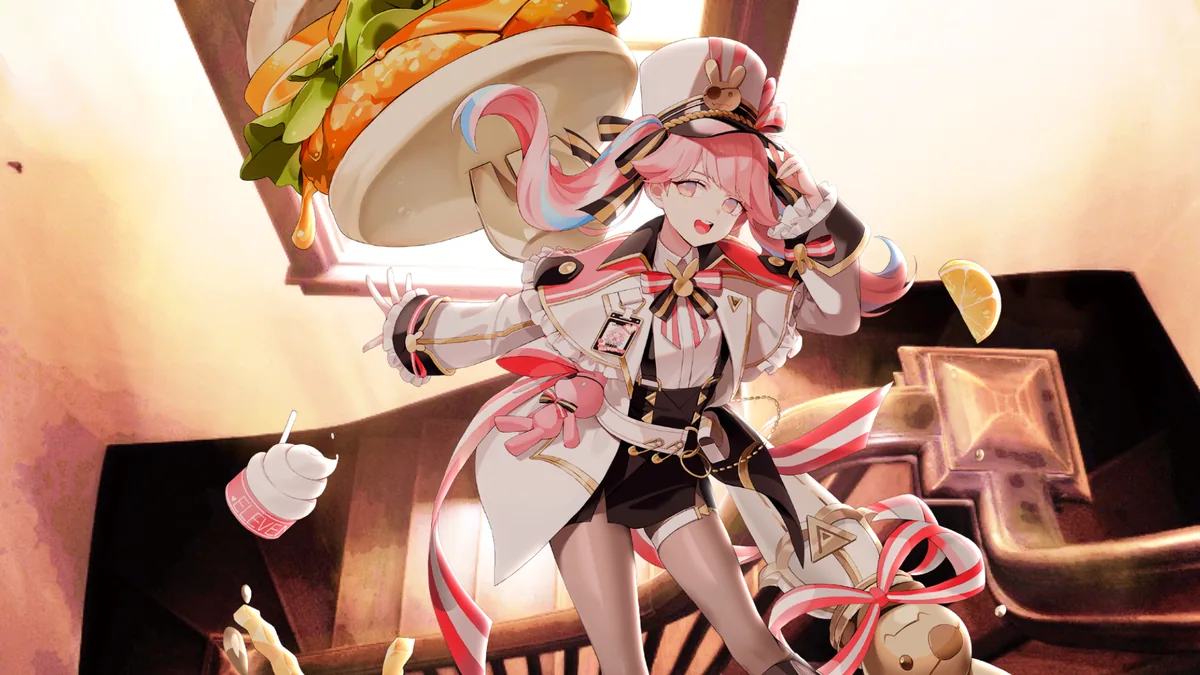
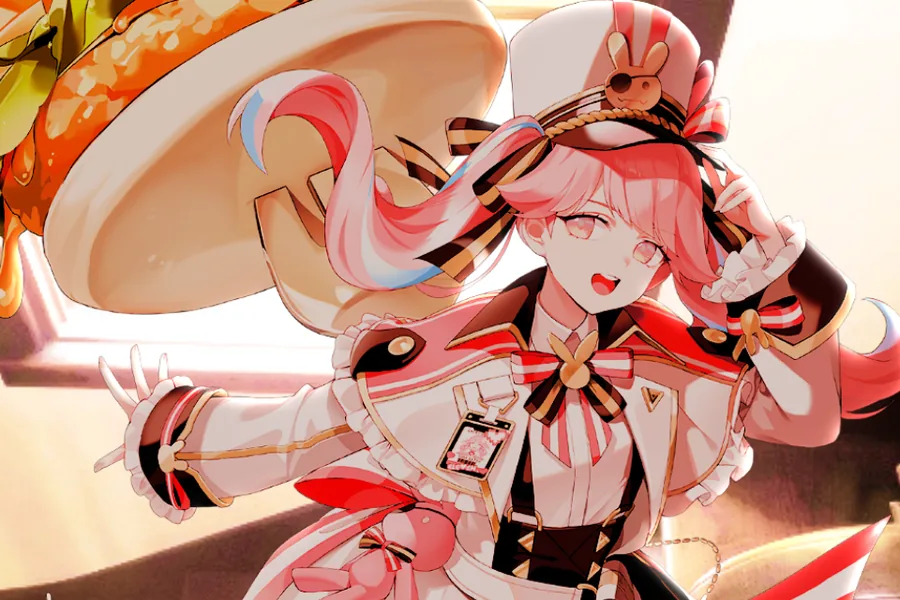
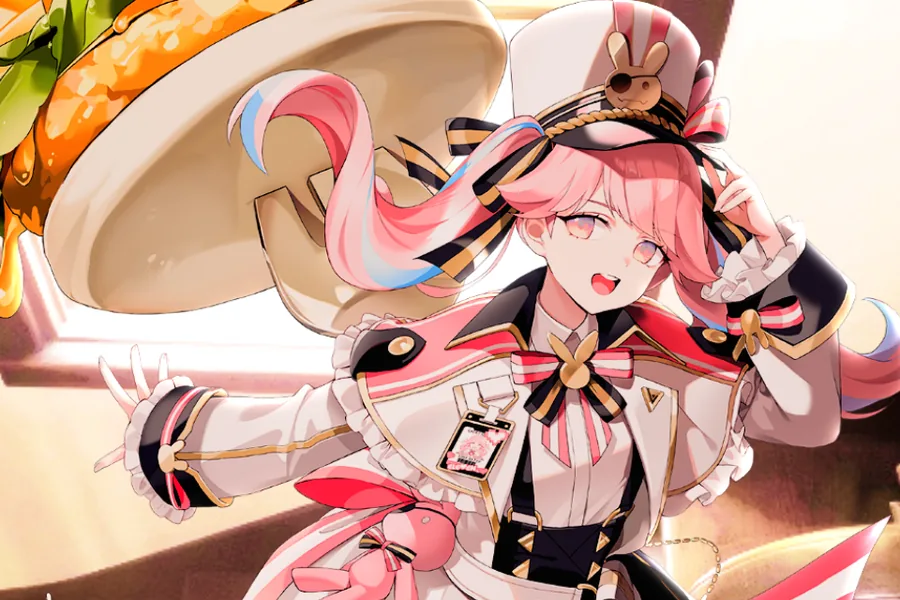
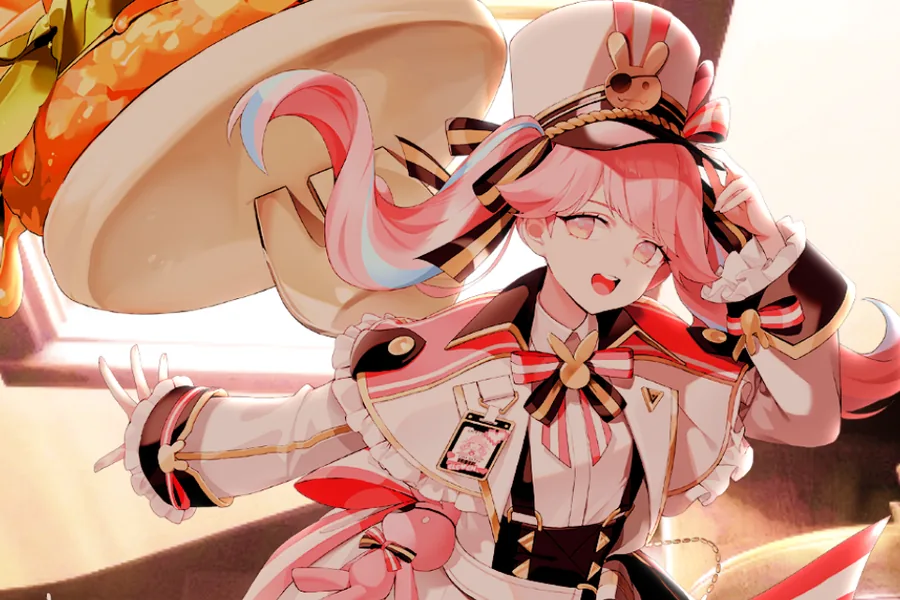
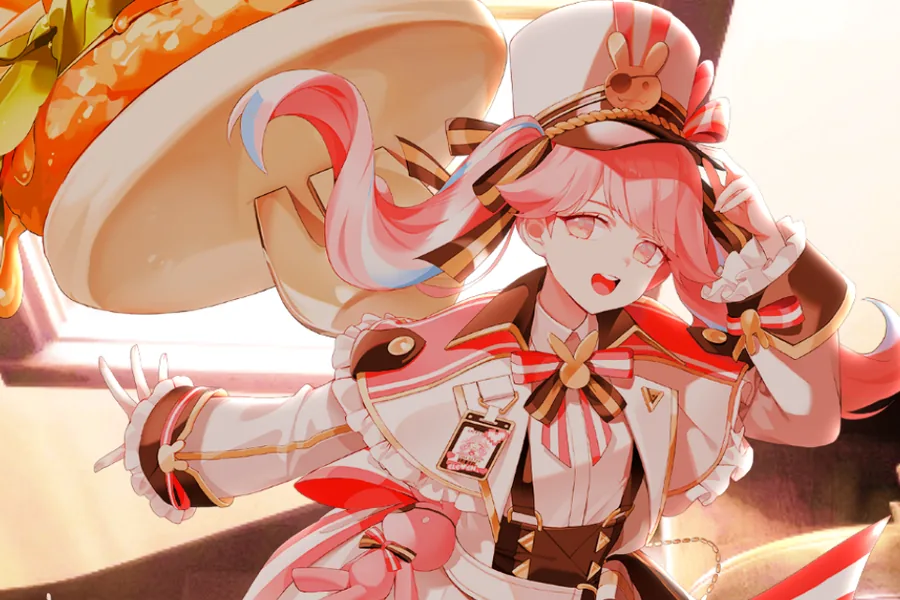
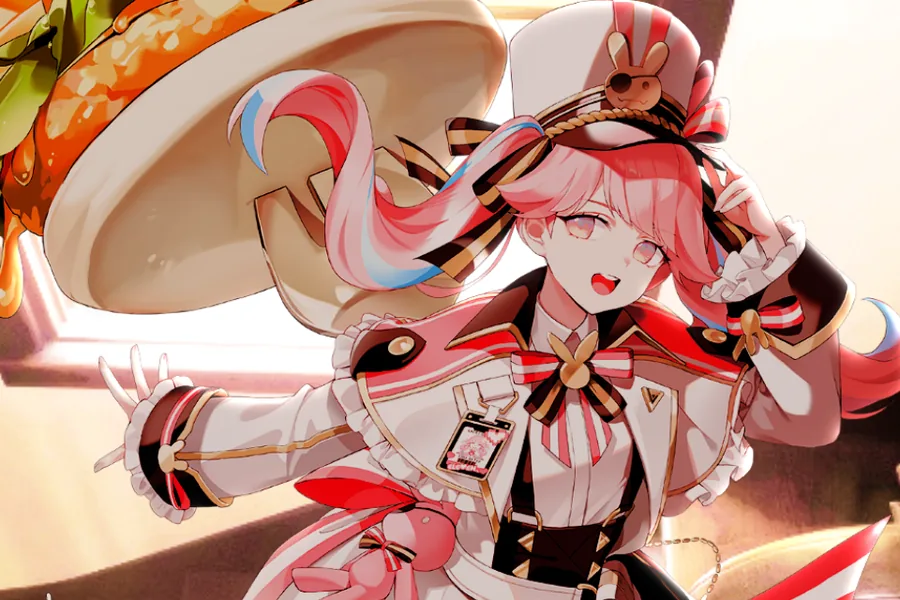
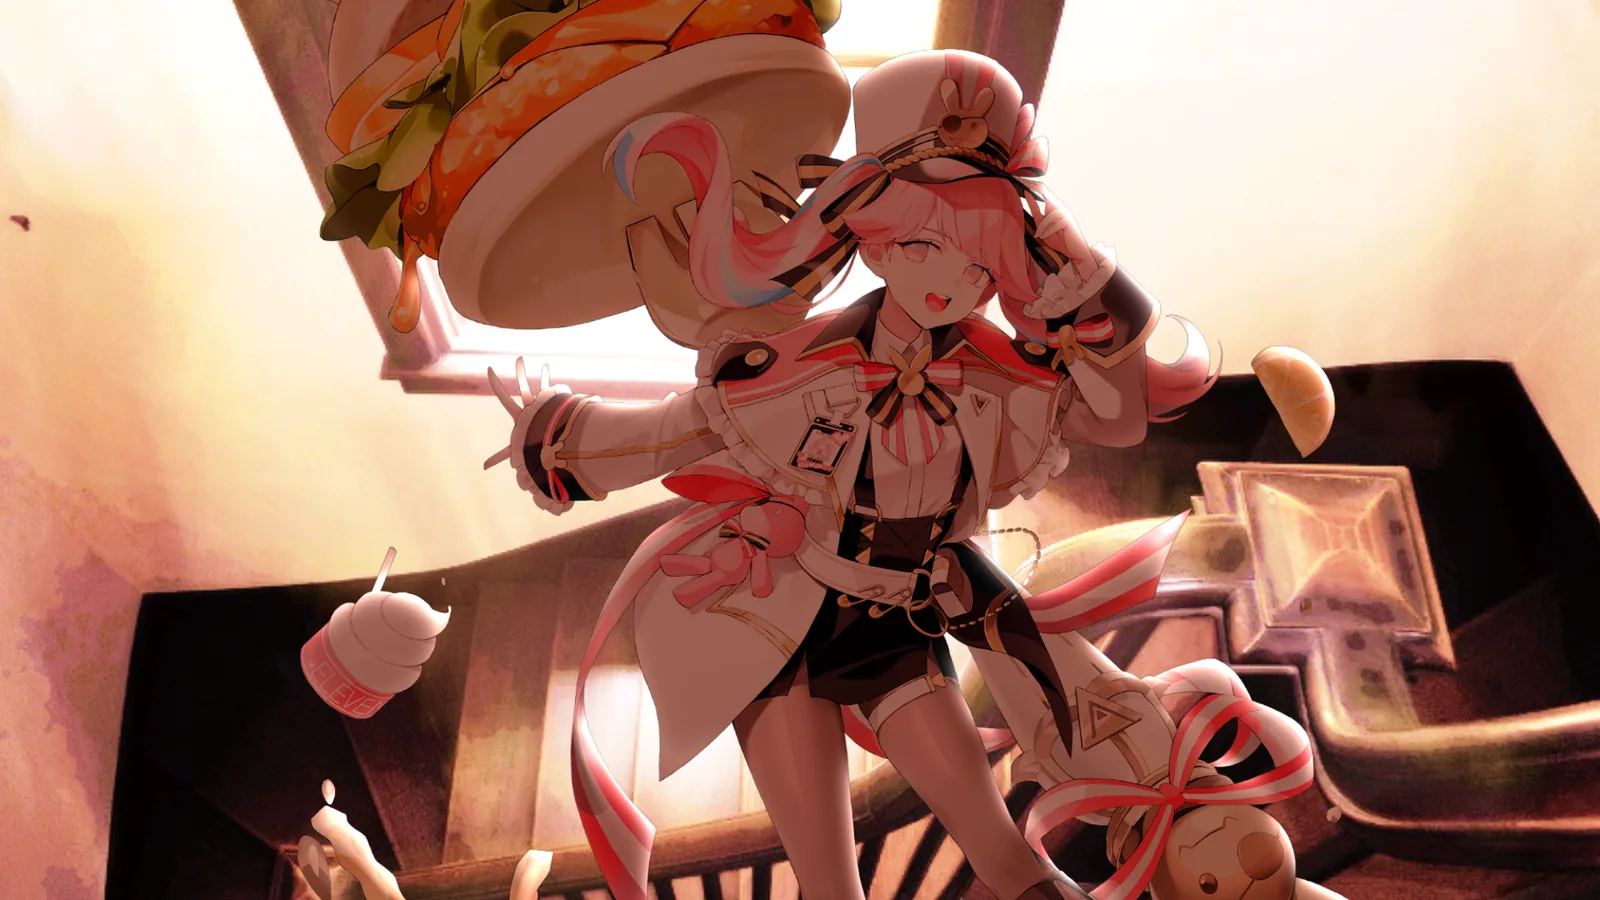
잘라 붙인 캐릭터를 배경에 앉힙니다Seats a cut-out character into its background切り抜いたキャラクターを背景になじませます배경 레이어를 고르고 적용을 누르면 배경의 빛 색과 명암이 캐릭터로 옮겨 갑니다Pick the background layer and press Apply, and the background's light colour and tones carry over to the character背景レイヤーを選んで適用を押すと、背景の光の色と明暗がキャラクターに移ります
배경을 측정해 캐릭터의 색과 빛을 맞춥니다Measures the background and matches the character's colour and light背景を測定してキャラクターの色と光を合わせますAfter Effects와 Photoshop에 같은 패널, 한국어, English, 日本語The same panel in After Effects and Photoshop, in 한국어, English and 日本語After Effects と Photoshop に同じパネル、한국어、English、日本語GPU 가속, Windows는 CUDA, macOS는 MetalGPU accelerated, CUDA on Windows and Metal on macOSGPU 高速化、Windows は CUDA、macOS は Metal
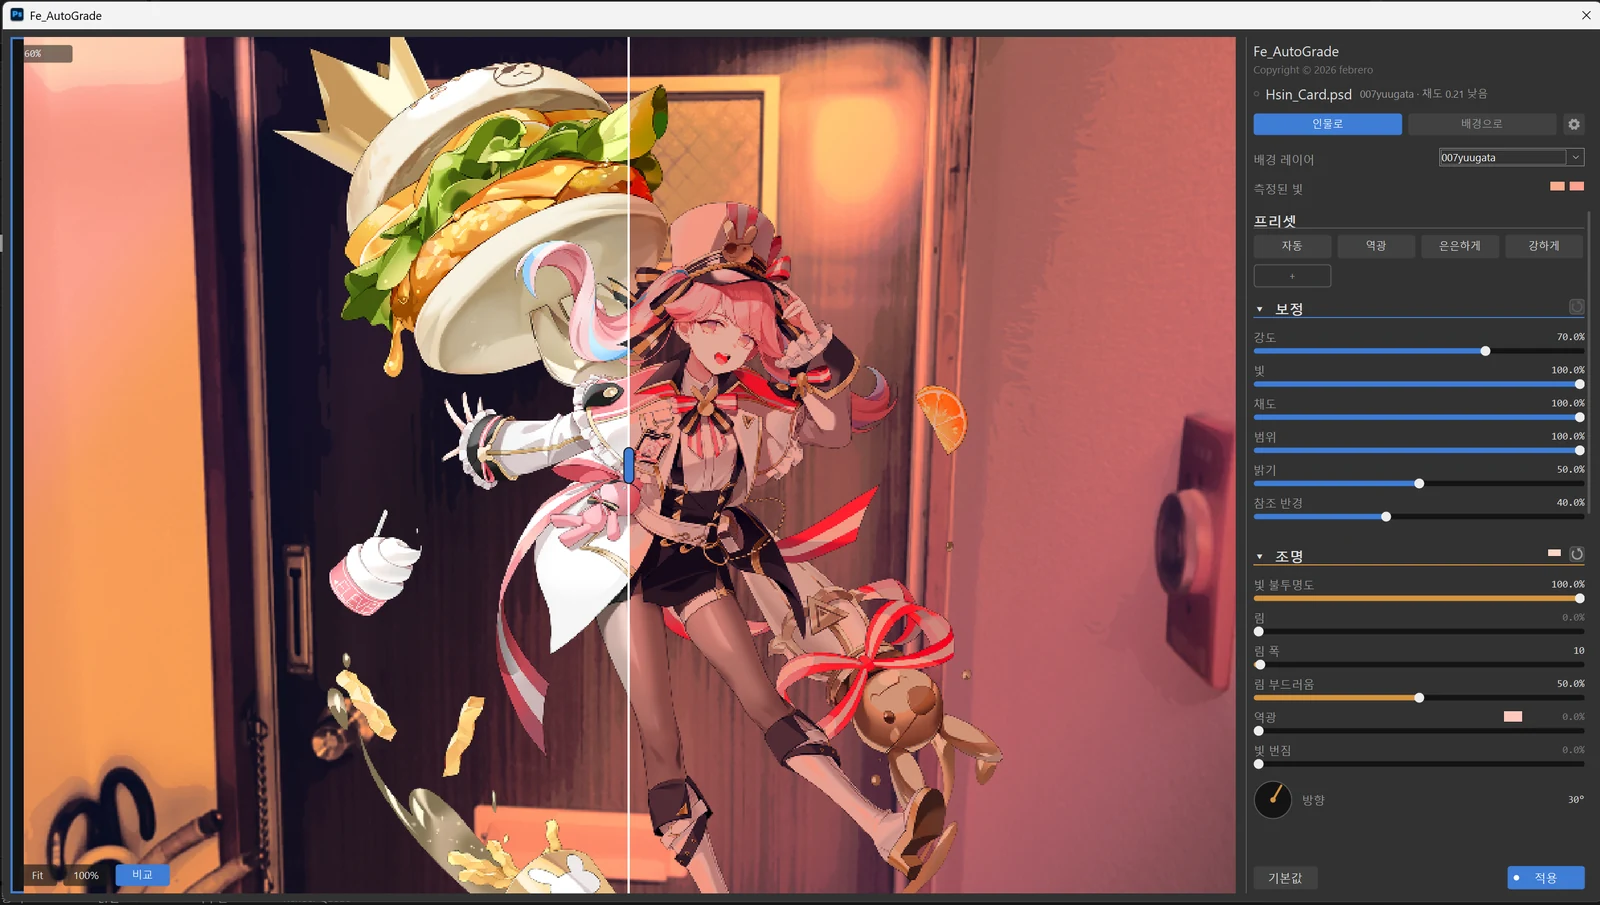
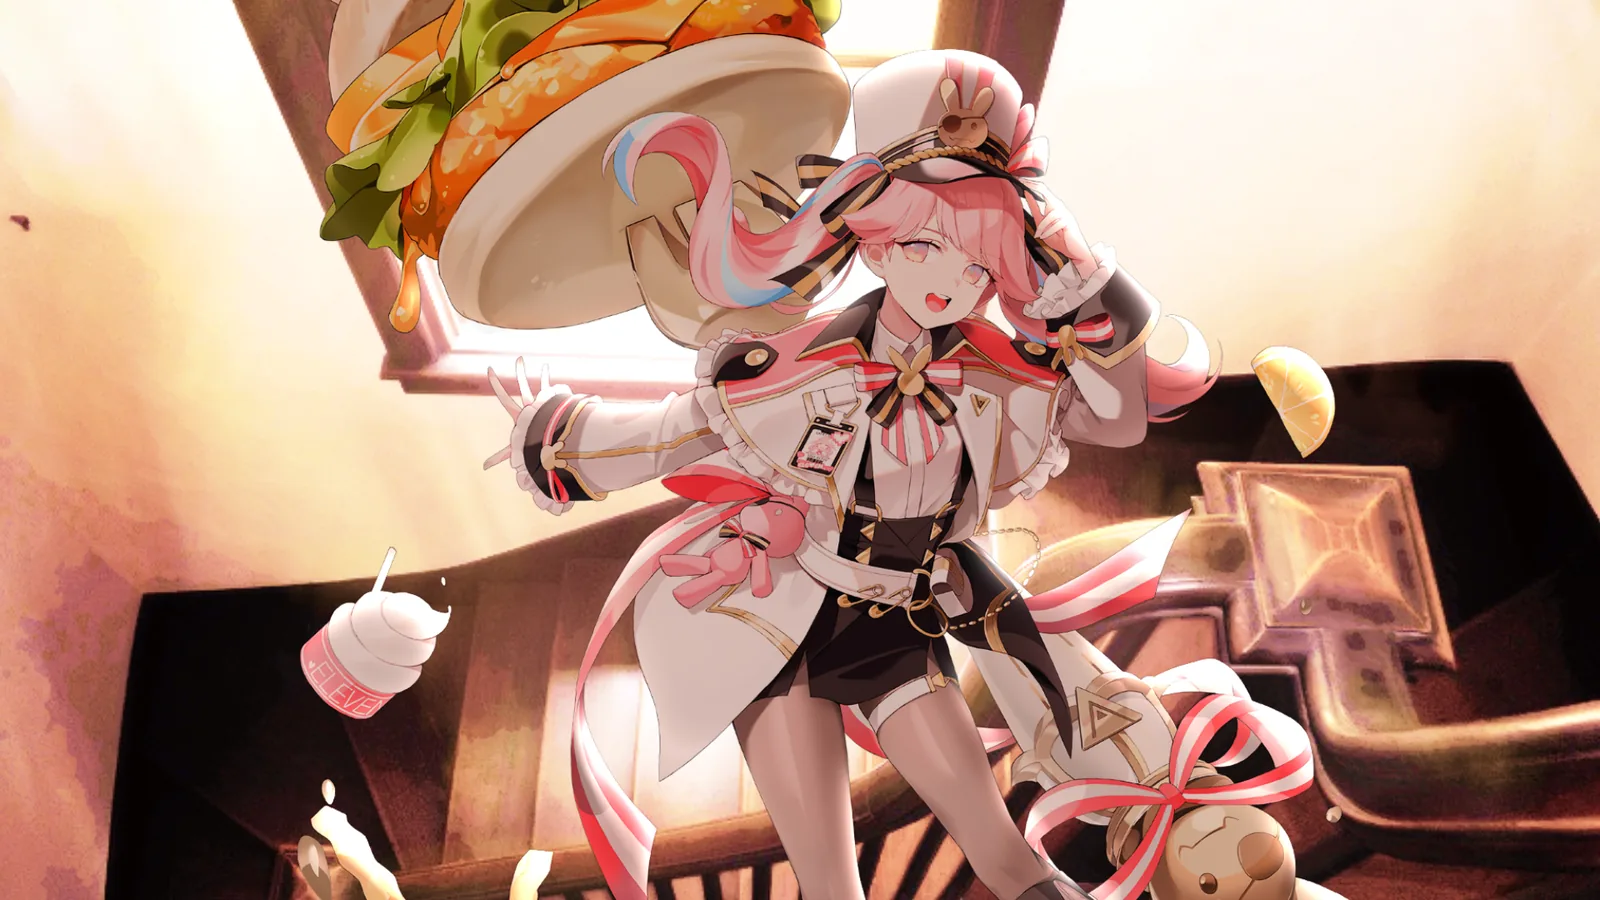
패널에서 배경 레이어를 고르고 적용을 누르면 이렇게 됩니다, 배경 넷을 바꿔 보세요Pick the background layer in the panel and press Apply to get this, try all four backgroundsパネルで背景レイヤーを選んで適用を押すとこうなります。四つの背景を切り替えてみてください이 페이지의 그림과 영상은 모두 플러그인이 직접 렌더한 것입니다Every image and video on this page was rendered by the plugin itselfこのページの画像と動画はすべてプラグインが実際にレンダリングしたものです
보정은 네 줄, 따로 켜고 끕니다The match has four parts, each with its own switch補正は四つ、それぞれ個別にオン・オフしますMatch
배경에서 측정한 값을 캐릭터에 옮기는 네 가지입니다Four things measured from the background and carried over to the character背景から測定した値をキャラクターに移す四つの項目です 하나를 꺼 보면 그 줄이 하는 일이 보입니다, 강도를 끌면 전체가 얼마나 옮겨 가는지 보입니다Switch one off to see what it does, drag Strength to see how much carries over in all一つをオフにするとその項目の役割が見え、強度を動かすと全体がどれだけ移るかが見えます
보정MATCHカラーマッチMatch
Strength (강도)StrengthStrength (強度)
Strength (강도)가 네 줄 전체의 세기입니다, 0이면 원본 그대로, 100이면 측정한 값을 그대로 넣습니다Strength sets how much of all four is applied, 0 leaves the original untouched and 100 applies the measured values in fullStrength (強度) は四つ全体の強さです。0 なら元のまま、100 なら測定した値をそのまま入れます 피부로 판정된 부분은 색 변화를 60% 덜 받아서 파란 밤에서 얼굴은 어두워질 뿐 파래지지 않습니다Areas detected as skin take 60% less of the colour shift, so on a blue night a face gets darker but never blue肌と判定された部分は色の変化を 60% 少なく受けるので、青い夜でも顔は暗くなるだけで青くはなりません 흰색과 검정은 색이 틀어지지 않게 지킵니다Whites and blacks are kept from shifting in hue白と黒は色が転ばないように守ります
네 줄 모두 켬, Strength 200All four on, Strength 200四つすべてオン、Strength 200Light 끔Light offLight オフSaturation 끔Saturation offSaturation オフRange 끔Range offRange オフBrightness 끔Brightness offBrightness オフ
쓰는 법은 세 단계입니다Three steps to use it使い方は三つの手順ですHow to
열기Open開く
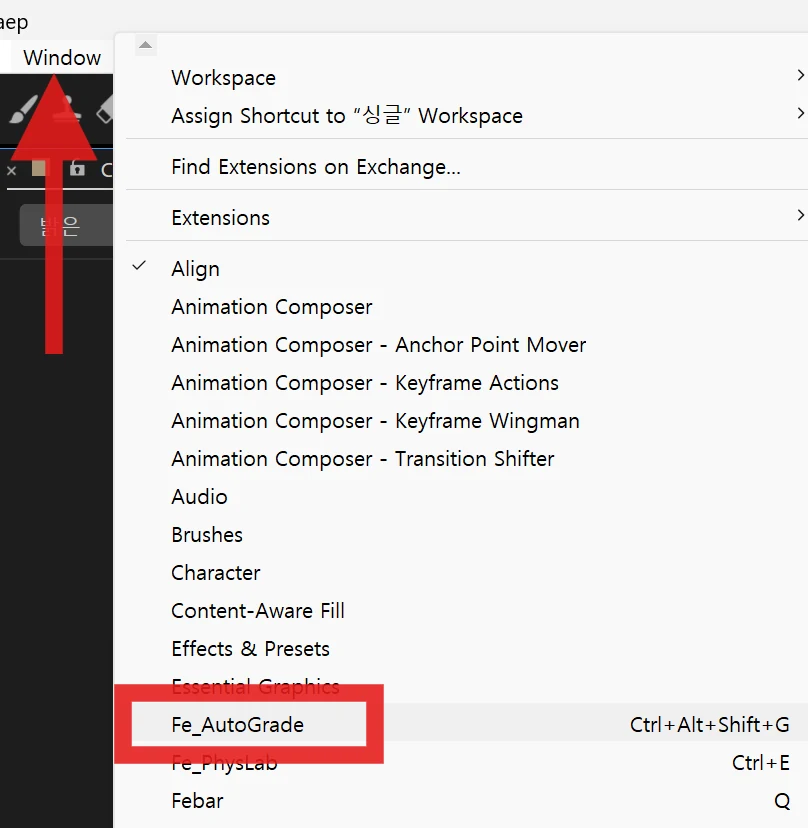
Window 메뉴에서 Fe_AutoGrade를 엽니다Open Fe_AutoGrade from the Window menuWindow メニューから Fe_AutoGrade を開きます 타임라인에서 캐릭터 레이어를 고르면 패널이 그 레이어를 잡습니다Select the character layer in the timeline and the panel picks it upタイムラインでキャラクターのレイヤーを選ぶと、パネルがそのレイヤーを対象にします
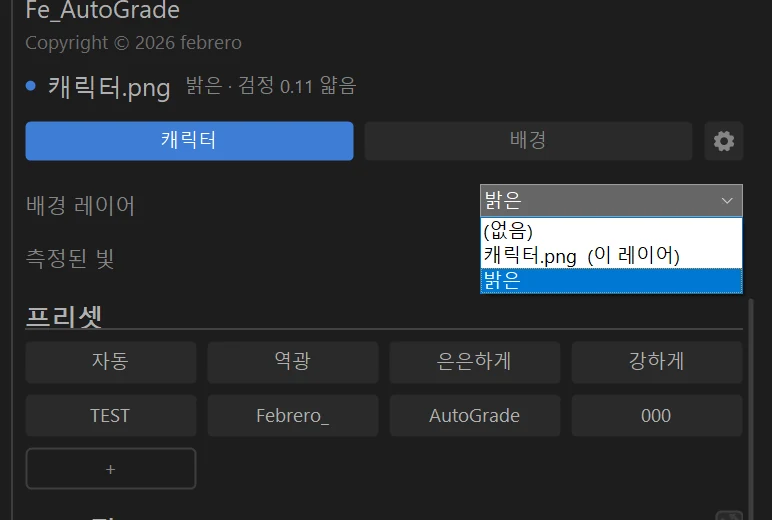
배경 레이어 고르기Pick the background layer背景レイヤーを選ぶ
배경 레이어 목록에서 배경을 고릅니다Choose the background from the Background layer list背景レイヤーの一覧から背景を選びます 배경은 자동으로 잡히지 않고 직접 고릅니다The background is not picked automatically, you choose it yourself背景は自動では選ばれないので、自分で選びます
적용Apply適用
미리보기가 마음에 들면 적용을 누릅니다When the preview looks right, press Applyプレビューが気に入ったら適用を押します 그때 실제 레이어에 이펙트가 들어갑니다That is when the effect goes onto the actual layerそのとき実際のレイヤーにエフェクトが入ります
Photoshop에서는 대화 상자로 뜹니다In Photoshop it opens as a dialogPhotoshop ではダイアログで開きます
필터 > Febrero_ > Fe_AutoGradeFilter > Febrero_ > Fe_AutoGradeフィルター > Febrero_ > Fe_AutoGrade 같은 패널이 그대로 열리고 미리보기도 같습니다The same panel opens, with the same preview同じパネルがそのまま開き、プレビューも同じです 레이어를 스마트 오브젝트로 바꿔 두면 스마트 필터로 들어가 더블클릭으로 다시 열립니다Convert the layer to a Smart Object first and it goes in as a Smart Filter you can reopen with a double clickレイヤーをスマートオブジェクトにしておくとスマートフィルターとして入り、ダブルクリックでもう一度開けます 8, 16, 32비트 RGB 문서를 모두 지원합니다8, 16 and 32-bit RGB documents are all supported8、16、32 ビットの RGB ドキュメントすべてに対応します
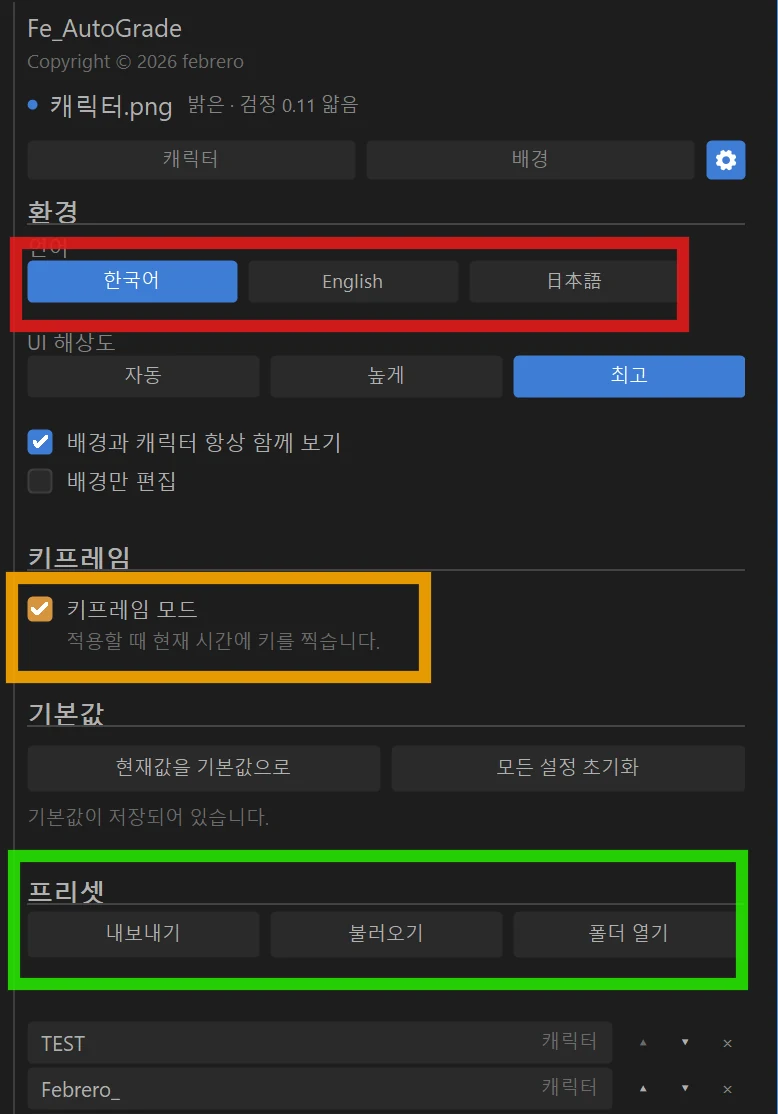
세 언어Three languages三つの言語패널의 모든 글이 한국어, English, 日本語로 뜹니다Every word in the panel comes in 한국어, English and 日本語パネルのすべての文字が 한국어、English、日本語 で表示されます 처음에는 운영체제 언어를 따르고 한 번 고르면 기억합니다It follows the system language at first and remembers your choice once made最初は OS の言語に従い、一度選ぶと記憶します
키프레임Keyframesキーフレーム키프레임 모드를 켜면 적용할 때 현재 시간에 키를 찍습니다With Keyframe mode on, Apply sets keys at the current timeキーフレームモードをオンにすると、適用時に現在の時間にキーを設定します 시간을 옮겨 값을 바꾸고 다시 적용하면 그 사이가 움직입니다Move in time, change the values and apply again, and the gap between them animates時間を移して値を変え、もう一度適用すると、その間がアニメーションになります
프리셋 저장Saving presetsプリセットの保存+를 눌러 지금 값을 프리셋으로 저장합니다Press + to save the current values as a preset+ を押して今の値をプリセットとして保存します 설정에서 파일로 내보내 다른 컴퓨터로 옮길 수 있습니다Export them to a file from Settings to move them to another computer設定からファイルに書き出して、別のパソコンへ移せます
설정Settings設定탭 줄 오른쪽 끝의 톱니가 설정입니다The gear at the right end of the tab strip opens Settingsタブ列の右端の歯車が設定です UI 해상도는 미리보기만 촘촘하게 그리고 렌더에는 영향이 없습니다UI Resolution only draws the preview more finely and has no effect on the renderUI 解像度はプレビューを細かく描くだけで、レンダリングには影響しません
조명, 배경, 효과를 더합니다Add lighting, background and effectsライト、背景、エフェクトを加えますLighting
보정 다음에 오는 구역들입니다The sections that come after the match補正の次に来る区分です 값을 끌면 그림이 그 값으로 렌더한 프레임으로 바뀌고, 아래 띠에 그 값의 프레임이 전부 깔립니다Drag a value and the picture switches to a frame rendered at that value, with every frame of that control laid out in the strip below値を動かすと、その値でレンダリングしたフレームに絵が変わり、下の帯にその値のフレームがすべて並びます
프리셋PRESETSプリセット한 번에 여러 값을 넣습니다Sets several values at once複数の値を一度に入れます
캐릭터Characterキャラクター
배경Background背景
조명LIGHTライトLighting
Rim (림)RimRim (リム)
Wrap (빛 번짐)WrapWrap (回り込み)
Backlight (역광)BacklightBacklight (逆光)
Glow (글로우)GlowGlow (グロー)
Direction (방향)DirectionDirection (方向)
Light Color와 Backlight Color는 배경에서 읽은 빛 색과 환경광 색입니다Light Color and Backlight Color are the light and ambient colours read from the backgroundLight Color と Backlight Color は背景から読んだ光の色と環境光の色です 슬라이더 오른쪽의 색을 눌러 바꿀 수 있고 한 번 고른 색은 다시 측정해도 바뀌지 않습니다Click the swatch to the right of a slider to change it, and a colour you pick stays even when the scene is measured againスライダー右の色をクリックすると変えられ、一度選んだ色は再測定しても変わりません Rim Width와 Rim Soft는 림의 두께와 부드러움, Lighting Opacity는 조명 전체의 세기입니다Rim Width and Rim Soft set the rim's thickness and softness, Lighting Opacity the strength of all the lightingRim Width と Rim Soft はリムの太さとやわらかさ、Lighting Opacity はライト全体の強さです
배경 값은 배경 레이어에 Fe_AutoGrade_BG 이펙트로 들어갑니다Background values go onto the background layer as the Fe_AutoGrade_BG effect背景の値は背景レイヤーに Fe_AutoGrade_BG エフェクトとして入ります 다른 배경 레이어로 바꾸면 이전 배경의 보정은 자동으로 풀립니다Switch to another background layer and the grade comes off the old one automatically別の背景レイヤーに変えると、前の背景の補正は自動で外れます
그림에 원래 있는 빛만 쓰고 없던 무늬를 그려 넣지 않습니다Only light that is already in the picture is used, nothing is painted in絵にもともとある光だけを使い、なかった模様を描き足しません 인물·배경 동시적용을 켜면 광선이 인물 앞을 지나갑니다Turn on 'Character and background at once' and the rays pass in front of the figureキャラクターと背景に同時適用をオンにすると、光線がキャラクターの前を通ります
질감TEXTUREテクスチャTexture
Glow Where (위치)Glow WhereGlow Where (位置)
그레이드 구역의 Exposure, Contrast, Chroma, Temperature, Curve는 맨 아래 파라미터 지도에 있습니다Exposure, Contrast, Chroma, Temperature and Curve in the GRADE section are in the parameter map at the bottomグレーディング区分の Exposure、Contrast、Chroma、Temperature、Curve は一番下のパラメーター一覧にあります
다운로드와 설치Download and installダウンロードとインストールDownload
압축 파일 하나에 Windows, macOS, After Effects, Photoshop용이 모두 들어 있습니다One archive holds everything for Windows, macOS, After Effects and Photoshop一つの圧縮ファイルに Windows、macOS、After Effects、Photoshop 用がすべて入っています 쓰는 것만 꺼내면 됩니다Take out only what you use使うものだけ取り出してください
Windows
After EffectsFe_AutoGrade.aex이펙트 두 개와 패널이 이 파일 하나에Both effects and the panel in this one file二つのエフェクトとパネルがこの一つのファイルに
PhotoshopFe_AutoGrade_Ps.8bf필터와 같은 패널이 이 파일 하나에The filter and the same panel in this one fileフィルターと同じパネルがこの一つのファイルに
macOS11 Big Sur 이상, 인텔과 애플 실리콘 모두11 Big Sur or later, Intel and Apple silicon11 Big Sur 以降、Intel と Apple シリコンの両方
After EffectsFe_AutoGrade.pluginFe_AutoGrade_Panel.plugin이펙트와 패널이 폴더 두 개로 나뉘어 있어 둘 다 넣습니다The effects and the panel come as two folders, put both inエフェクトとパネルが二つのフォルダーに分かれているので、両方入れます
PhotoshopFe_AutoGrade_Ps.plugin필터와 같은 패널이 이 폴더 하나에The filter and the same panel in this one folderフィルターと同じパネルがこの一つのフォルダーに
무료이고 상업적인 작업에도 그대로 쓸 수 있습니다Free, and fine for commercial work as it is無料で、商用の制作にもそのまま使えます 버튼을 누르면 Buy Me a Coffee 다운로드 페이지가 열립니다The button opens the Buy Me a Coffee download pageボタンを押すと Buy Me a Coffee の配布ページが開きます
설치Installインストール
쓰는 프로그램을 닫습니다Close the program you use使うプログラムを閉じます 켜져 있는 동안은 파일이 잠겨 복사할 수 없습니다While it is running the file is locked and cannot be copied起動中はファイルがロックされてコピーできません
Windows After Effects C:\Program Files\Adobe\Adobe After Effects [연도]\Support Files\Plug-insC:\Program Files\Adobe\Adobe After Effects [year]\Support Files\Plug-insC:\Program Files\Adobe\Adobe After Effects [年]\Support Files\Plug-ins Photoshop C:\Program Files\Adobe\Adobe Photoshop [연도]\Plug-insC:\Program Files\Adobe\Adobe Photoshop [year]\Plug-insC:\Program Files\Adobe\Adobe Photoshop [年]\Plug-ins 바로 옆 Required\Plug-Ins 폴더는 아닙니다, 업데이트마다 덮어써집니다Not the Required\Plug-Ins folder right next to it, which every update overwritesすぐ隣の Required\Plug-Ins フォルダーではありません。更新のたびに上書きされます
macOS After Effects /Applications/Adobe After Effects [연도]/Plug-ins/Applications/Adobe After Effects [year]/Plug-ins/Applications/Adobe After Effects [年]/Plug-ins Photoshop /Applications/Adobe Photoshop [연도]/Plug-ins/Applications/Adobe Photoshop [year]/Plug-ins/Applications/Adobe Photoshop [年]/Plug-ins Mac 폴더의 zip은 macOS에서 풀고 나온 폴더를 넣습니다Unzip the zips in the Mac folder on macOS, then put in the folders that come outMac フォルダーの zip は macOS で展開し、出てきたフォルダーを入れます
macOS는 처음 한 번 잠금을 풉니다On macOS, unlock the files oncemacOS では最初に一度だけロックを解除します 인터넷에서 받은 파일은 macOS가 잠가 두기 때문에 그대로 두면 프로그램이 아무 말 없이 무시합니다macOS locks files downloaded from the internet, and left that way the program ignores the plugin without a wordインターネットから受け取ったファイルは macOS がロックするため、そのままではプログラムが何も言わずに無視します 터미널을 열고 쓰는 프로그램의 줄을 한 줄씩 붙여 넣고 엔터를 누릅니다, 앞의 두 줄은 After Effects, 마지막 줄은 Photoshop입니다Open Terminal, paste the lines for your program one at a time and press Enter after each: the first two lines are for After Effects, the last one for Photoshopターミナルを開き、使うプログラムの行を一行ずつ貼り付けて Enter を押します。最初の二行が After Effects、最後の一行が Photoshop 用ですxattr -dr com.apple.quarantine "/Applications/Adobe After Effects [연도]/Plug-ins/Fe_AutoGrade.plugin"xattr -dr com.apple.quarantine "/Applications/Adobe After Effects [year]/Plug-ins/Fe_AutoGrade.plugin"xattr -dr com.apple.quarantine "/Applications/Adobe After Effects [年]/Plug-ins/Fe_AutoGrade.plugin"xattr -dr com.apple.quarantine "/Applications/Adobe After Effects [연도]/Plug-ins/Fe_AutoGrade_Panel.plugin"xattr -dr com.apple.quarantine "/Applications/Adobe After Effects [year]/Plug-ins/Fe_AutoGrade_Panel.plugin"xattr -dr com.apple.quarantine "/Applications/Adobe After Effects [年]/Plug-ins/Fe_AutoGrade_Panel.plugin"xattr -dr com.apple.quarantine "/Applications/Adobe Photoshop [연도]/Plug-ins/Fe_AutoGrade_Ps.plugin"xattr -dr com.apple.quarantine "/Applications/Adobe Photoshop [year]/Plug-ins/Fe_AutoGrade_Ps.plugin"xattr -dr com.apple.quarantine "/Applications/Adobe Photoshop [年]/Plug-ins/Fe_AutoGrade_Ps.plugin"아무것도 나오지 않고 끝나면 정상입니다If it finishes without printing anything, it worked何も表示されずに終われば正常です
프로그램을 켭니다Start the programプログラムを起動します After Effects는After Effects has it underAfter Effects はWindow > Fe_AutoGrade, Photoshop은, Photoshop under、Photoshop は필터 > Febrero_ > Fe_AutoGradeFilter > Febrero_ > Fe_AutoGradeフィルター > Febrero_ > Fe_AutoGrade에 있습니다にあります
안 될 때Troubleshooting困ったときHelp
패널이 안 보입니다The panel does not show upパネルが見つかりません
Window메뉴 아래쪽에 Fe_AutoGrade가 있습니다menu has Fe_AutoGrade near the bottomメニューの下の方に Fe_AutoGrade があります 없다면 파일을 넣은 뒤 프로그램을 완전히 다시 시작했는지, 폴더가 맞는지 확인하세요, 여러 연도가 깔려 있다면 지금 쓰는 것에 넣어야 합니다If it is not there, check that the program was fully restarted after copying the file and that the folder is right, and with several years installed it must go into the one you runなければ、ファイルを入れたあとプログラムを完全に再起動したか、フォルダーが正しいかを確かめてください。複数の年度が入っている場合は、今使っている方に入れる必要があります macOS는 Fe_AutoGrade_Panel.plugin도 넣었는지, 설치의 잠금 풀기를 했는지 확인하세요On macOS, check that Fe_AutoGrade_Panel.plugin went in too and that the unlock step of the install was donemacOS では Fe_AutoGrade_Panel.plugin も入れたか、インストールのロック解除を済ませたかを確かめてください
Strength를 올려도 변화가 없습니다Raising Strength changes nothingStrength を上げても変わりません
배경 레이어를 고르지 않았거나, 배경이 완전히 투명하거나, 완전한 검정이라 빛 색을 읽을 수 없거나, 레이어가 자기 자신을 배경으로 골랐을 때는 아무 일도 일어나지 않습니다Nothing happens when no background layer is chosen, when the background is fully transparent, when it is pure black so no light colour can be read, or when the layer is its own background背景レイヤーを選んでいない、背景が完全に透明、真っ黒で光の色が読めない、自分自身を背景に選んだ、のいずれかのときは何もしません 배경 탭의Check the Background tab's背景タブの측정된 빛Measured light測定した光이 비어 있다면 이 경우입니다: if it is empty, this is the caseが空ならこの状態です 다른 배경 레이어로 바꿔 보세요Try another background layer別の背景レイヤーに変えてみてください
배경에 색보정이 걸려 있는데 거기에 안 맞습니다The background is colour corrected but the match ignores it背景に色補正がかかっているのに、その色に合いません
이펙트를 직접 걸면 Ref Layer의Applied directly, the effect reads only the Ref Layer'sエフェクトを直接かけると Ref Layer の원본source元画像だけ만 읽어서 보정 전 색에 맞춥니다, so it matches the colour before correctionを読むため、補正前の色に合わせます 패널에서 적용하면 완성된 배경을 측정해 값을 넣어 두므로 프리컴포즈가 필요 없습니다Applied from the panel it measures the finished background and bakes the values in, so no precompose is neededパネルから適用すると、完成した背景を測定して値を入れておくので、プリコンポーズは不要です 꼭 직접 걸어야 한다면 배경을 프리컴포즈해서 그 컴포지션을 Ref Layer로 고르세요If you must apply it directly, precompose the background and choose that comp as the Ref Layer直接かける必要があるなら、背景をプリコンポーズしてそのコンポジションを Ref Layer に選びます
얼굴이 배경 색에 물들지 않습니다The face does not take the background's colour顔が背景の色に染まりません
의도한 것입니다That is intended意図した動作です 피부로 판정된 부분은 색 변화를 60% 덜 받고 밝기 변화는 그대로 받아서 파란 밤에서 얼굴은 어두워지되 파래지지 않습니다Skin takes 60% less of the colour shift and all of the brightness shift, so on a blue night the face darkens but does not turn blue肌と判定された部分は色の変化を 60% 少なく受け、明るさの変化はそのまま受けるので、青い夜でも顔は暗くなるだけで青くなりません
렌더링이 느립니다Rendering is slowレンダリングが遅いです
File > Project Settings > Video Rendering and Effects에서 Mercury GPU 가속이 Windows는 CUDA, macOS는 Metal로 되어 있는지 확인하세요: Mercury GPU Acceleration should be CUDA on Windows or Metal on macOSで Mercury GPU 高速化が Windows は CUDA、macOS は Metal になっているか確かめてください Windows는 NVIDIA 카드가 필요하고, GTX 10 시리즈와 그 이전 카드는 CPU로 렌더링합니다Windows needs an NVIDIA card, and GTX 10 series and older cards render on the CPUWindows では NVIDIA のカードが必要で、GTX 10 シリーズ以前のカードは CPU でレンダリングします Blur, Sun Shafts, Lighting을 켠 프레임은 카드 메모리를 조금 더 쓰고, 부족하면 CPU로 넘어갑니다, 결과는 같고 속도만 느려집니다Frames with Blur, Sun Shafts or Lighting on use a little more card memory, and if it runs out the render falls back to the CPU with the same result, only slowerBlur、Sun Shafts、Lighting をオンにしたフレームはカードのメモリを少し多く使い、足りなければ CPU に切り替わります。結果は同じで速度だけが遅くなります
Photoshop에서 나중에 값을 고치고 싶습니다I want to change the values later in PhotoshopPhotoshop であとから値を直したいです
필터를 걸기 전에 레이어를Before applying the filter, convert the layer to aフィルターをかける前にレイヤーを스마트 오브젝트Smart Objectスマートオブジェクト로 바꿔 두세요にしておいてください 스마트 필터가 되어 더블클릭하면 같은 패널이 그 값으로 다시 열립니다It then becomes a Smart Filter, and a double click reopens the same panel with those valuesスマートフィルターになり、ダブルクリックすると同じパネルがその値でもう一度開きます
Photoshop 필터 메뉴에 없습니다It is not in the Photoshop Filter menuPhotoshop のフィルターメニューにありません
Plug-ins폴더가 맞는지 확인하세요folder: check that the file is in the right oneフォルダーが正しいか確かめてください 옆의 Required\Plug-Ins에 넣으면 업데이트 때 사라집니다Placed in Required\Plug-Ins next to it, it disappears on the next update隣の Required\Plug-Ins に入れると更新時に消えます RGB 모드 문서에서만 쓸 수 있습니다Only RGB documents are supportedRGB モードのドキュメントでのみ使えます macOS는 설치의 잠금 풀기를 했는지도 확인하세요On macOS, also check that the unlock step of the install was donemacOS ではインストールのロック解除を済ませたかも確かめてください
예전에 만든 프로젝트가 안 열립니다An old project no longer opens以前に作ったプロジェクトが開きません
이 플러그인은 최신 버전만 지원합니다Only the latest build of this plugin is supportedこのプラグインは最新版のみサポートしています 다시 열어야 할 프로젝트가 있다면 그때 쓰던 플러그인 파일을 따로 보관하세요If you need to reopen a project, keep the plugin file you used at the timeもう一度開く必要のあるプロジェクトがあれば、当時のプラグインファイルを別に保管してください
라이선스Licenseライセンス
제작자Author制作者
febrero_
가격Price価格
무료Free無料
상업적 이용Commercial use商用利用
허용합니다Allowed許可します 광고, 방송, 상영작, 클라이언트 작업까지 모두 포함하며 표기 의무는 없습니다Advertising, broadcast, screenings and client work included, with no credit required広告、放送、上映作品、クライアントワークをすべて含み、表記の義務はありません
결과물의 권리Rights to your work成果物の権利
이 플러그인으로 만든 결과물의 권리는 모두 사용자에게 있습니다Everything you make with this plugin belongs entirely to youこのプラグインで作った成果物の権利はすべて利用者にあります 제작자는 어떤 권리도 주장하지 않습니다The author claims no rights to it制作者はいかなる権利も主張しません
재배포Redistribution再配布
플러그인 파일 자체를 다른 곳에 올리는 것은 허용하지 않습니다Uploading the plugin file itself elsewhere is not allowedプラグインファイル自体を他の場所にアップロードすることは許可しません 이 페이지 주소를 대신 알려 주세요Share the address of this page instead代わりにこのページのアドレスを伝えてください
2차 가공Derivative work二次加工
리버스 엔지니어링, 디컴파일, 다른 제품에 끼워 넣기, 이름을 바꾼 재배포는 허용하지 않습니다Reverse engineering, decompiling, bundling into another product and renamed redistribution are not allowedリバースエンジニアリング、逆コンパイル、他の製品への組み込み、名前を変えた配布は許可しません
문제 신고Reporting problems問題の報告
다운로드 페이지에 남겨 주세요Leave a note on the download page配布ページに書き残してください 어떤 프로그램의 몇 년 버전인지, 화면에 뜬 메시지만으로 충분합니다The program, its year and the message on screen are all that is neededどのプログラムの何年版か、画面に出たメッセージだけで十分です After Effects에서는 이펙트 메뉴의 About 화면을 찍으면 다 담깁니다In After Effects a capture of the About screen in the effect menu has everythingAfter Effects ではエフェクトメニューの About 画面を撮ればすべて入っています
면책Disclaimer免責
이 소프트웨어는 있는 그대로 제공되며 특정 목적에 대한 적합성을 포함해 어떤 보증도 하지 않습니다This software is provided as is, without warranty of any kind, including fitness for a particular purposeこのソフトウェアは現状のまま提供され、特定目的への適合性を含むいかなる保証もしません 사용으로 생긴 작업물 손실, 프로젝트 손상, 영업 손실 등 어떤 손해에도 제작자는 책임지지 않습니다The author is not liable for any loss, including lost work, damaged projects or lost business, arising from its use使用によって生じた作業物の損失、プロジェクトの破損、営業上の損失など一切の損害について制作者は責任を負いません 지원과 업데이트는 제작자 재량이며 특정 기간이나 특정 프로그램 버전에 대한 지원을 약속하지 않습니다Support and updates are at the author's discretion, with no promise of support for any period or any program versionサポートと更新は制作者の裁量によるもので、特定の期間や特定のプログラムへの対応を約束しません
파라미터 지도Parameter mapパラメーター一覧
이펙트 컨트롤에 뜨는 이름과 괄호 안 패널 이름, 색 띠는 패널의 구역입니다, 찾아볼 때만 펼치세요Names as they appear in the Effect Controls, the colour bands are the panel sections, open it only when you need to look something upエフェクトコントロールの名前と、括弧内にパネルの名前、色の帯はパネルの区分です。調べるときだけ開いてください
측정할 배경 레이어이며 직접 걸면 그 레이어의 원본만 읽습니다The background layer to measure, applied directly it reads only that layer's source測定する背景レイヤー。直接かけた場合はそのレイヤーの元画像だけを読みます
Strength (강도)StrengthStrength (強度)
보정 전체의 세기Overall strength of the match補正全体の強さ
Light (빛)LightLight (光)
주광과 환경광 색을 얼마나 입힐지How much of the key and ambient light colour is appliedキーライトと環境光の色をのせる量
Saturation (채도)SaturationSaturation (彩度)
배경 채도에 얼마나 맞출지, 밝은 곳은 덜 받습니다How far saturation is matched to the background, highlights take less背景の彩度に合わせる量。明るい所は少なめに受けます
Range (범위)RangeRange (範囲)
명암 범위를 배경에 얼마나 맞출지How far the tonal range is matched to the background明暗の範囲を背景に合わせる量
Brightness (밝기)BrightnessBrightness (明るさ)
중간 밝기를 얼마나 옮길지, 양 끝은 고정How far the midtones move, the ends stay fixed中間の明るさを動かす量、両端は固定
Alpha Min
이 알파값 이상인 픽셀만 캐릭터로 봅니다Only pixels above this alpha count as the characterこのアルファ値以上のピクセルだけをキャラクターと見なします
Ref Focus (참조 반경)Ref FocusRef Focus (参照半径)
캐릭터 주변을 온전히 재는 반경, 바깥은 4분의 1만 반영합니다Radius around the character that is weighted fully, outside it counts a quarterキャラクター周辺を重く測定する半径。外側は 4 分の 1 だけ反映します
얼마나 밝은 곳부터 번지게 할지How bright a pixel must be to bloomどれほど明るい所からにじませるか
Halation (할레이션)HalationHalation (ハレーション)
밝은 가장자리의 필름 같은 번짐Film-like bloom around bright edges明るい所の縁のフィルム的なにじみ
Halation Color
그 번짐의 색Colour of that bloomそのにじみの色
Edge Soft (주변부 흐림)Edge SoftEdge Soft (周辺のぼかし)
화면 모서리가 렌즈처럼 부드러워집니다The corners of the frame soften like a lens画面の隅がレンズのようにやわらかくぼけます
Edge Reach (흐림 범위)Edge ReachEdge Reach (ぼかしの範囲)
어디서부터 부드러워질지Where the softening startsどこからやわらかくなるか
그레이드GRADEグレーディングGrade
Exposure (노출)ExposureExposure (露光量)
스톱 단위In stopsストップ単位
Contrast (대비)ContrastContrast (コントラスト)
중간 밝기 기준Around the midtones中間の明るさが基準
Chroma (채도)ChromaChroma (クロマ)
0이면 그대로0 leaves it alone0 でそのまま
Temperature (색온도)TemperatureTemperature (色温度)
파랑과 노랑 축Blue to yellow青と黄の軸
Tint (색조)TintTint (色かぶり補正)
초록과 마젠타 축Green to magenta緑とマゼンタの軸
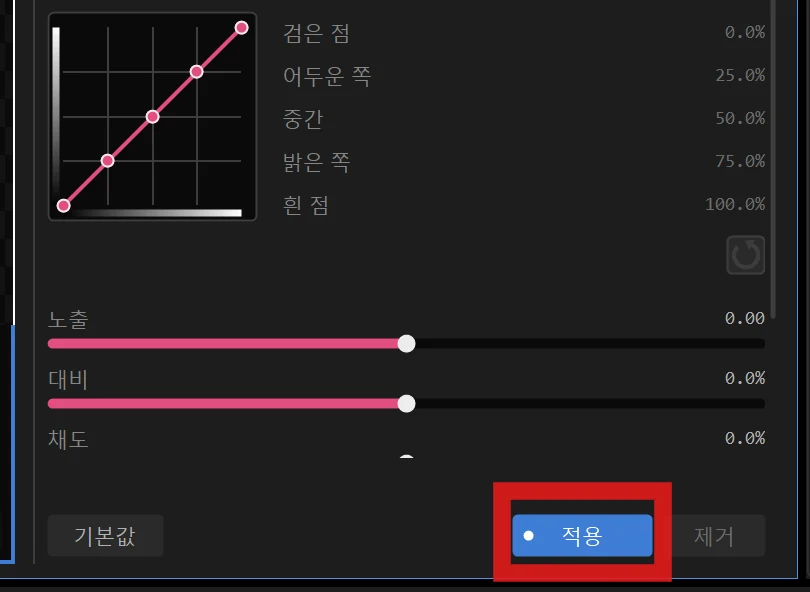
Curve Black (검은 점)Curve BlackCurve Black (黒レベル)
커브의 첫 점First point of the curveカーブの最初の点
Curve Low (어두운 쪽)Curve LowCurve Low (シャドウ)
커브의 그림자 쪽 점Shadow point of the curveカーブのシャドウの点
Curve Mid (중간)Curve MidCurve Mid (中間調)
커브의 중간 점Midpoint of the curveカーブの中間の点
Curve High (밝은 쪽)Curve HighCurve High (ハイライト)
커브의 하이라이트 쪽 점Highlight point of the curveカーブのハイライトの点
Curve White (흰 점)Curve WhiteCurve White (白レベル)
커브의 마지막 점Last point of the curveカーブの最後の点
Rolloff (밝은 곳 보호)RolloffRolloff (白飛び防止)
밝은 곳이 하얗게 날아가지 않도록Keeps highlights from blowing out白く飛ばないように
색 칩과 Alpha Min, Density, Haze Angle은 패널에 이름 줄이 없어 영어로만 나옵니다Colour swatches and Alpha Min, Density and Haze Angle have no row of their own in the panel色のチップと Alpha Min、Density、Haze Angle はパネルに名前の行がないため英語のみです Photoshop에서는 두 탭이 인물로 / 배경으로 로 나옵니다, 고른 레이어를 캐릭터로 쓸지 배경으로 쓸지 고르는 자리입니다In Photoshop the two tabs read As character / As background, where you choose whether the selected layer is used as the character or the backgroundPhotoshop では二つのタブが キャラクターとして / 背景として と表示されます。選んだレイヤーをキャラクターとして使うか背景として使うかを選ぶ所です
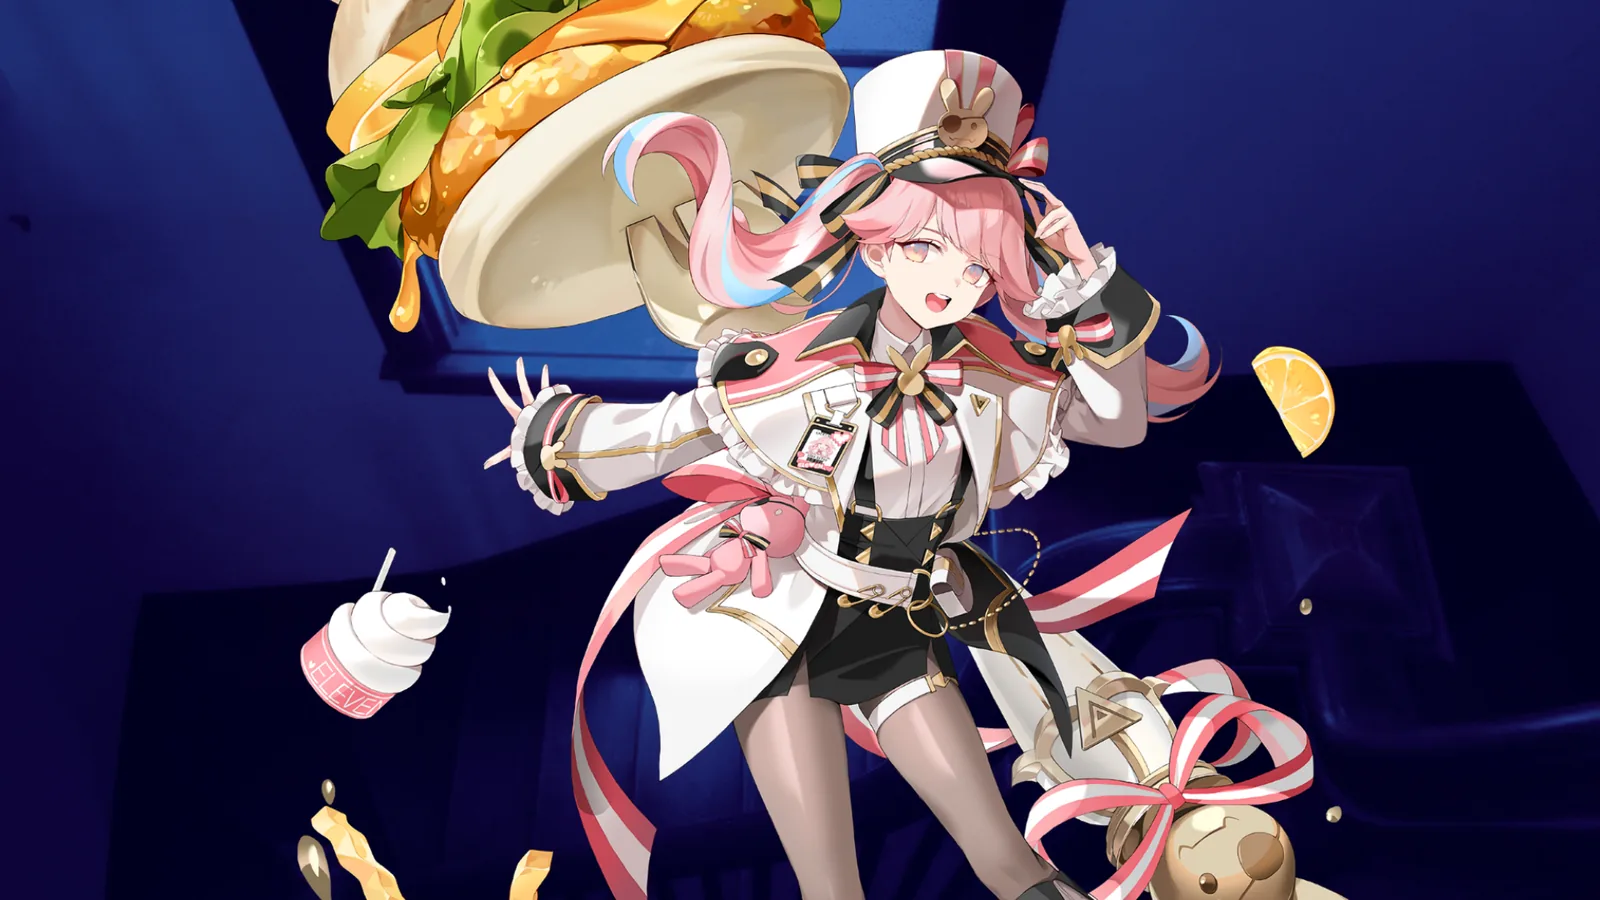
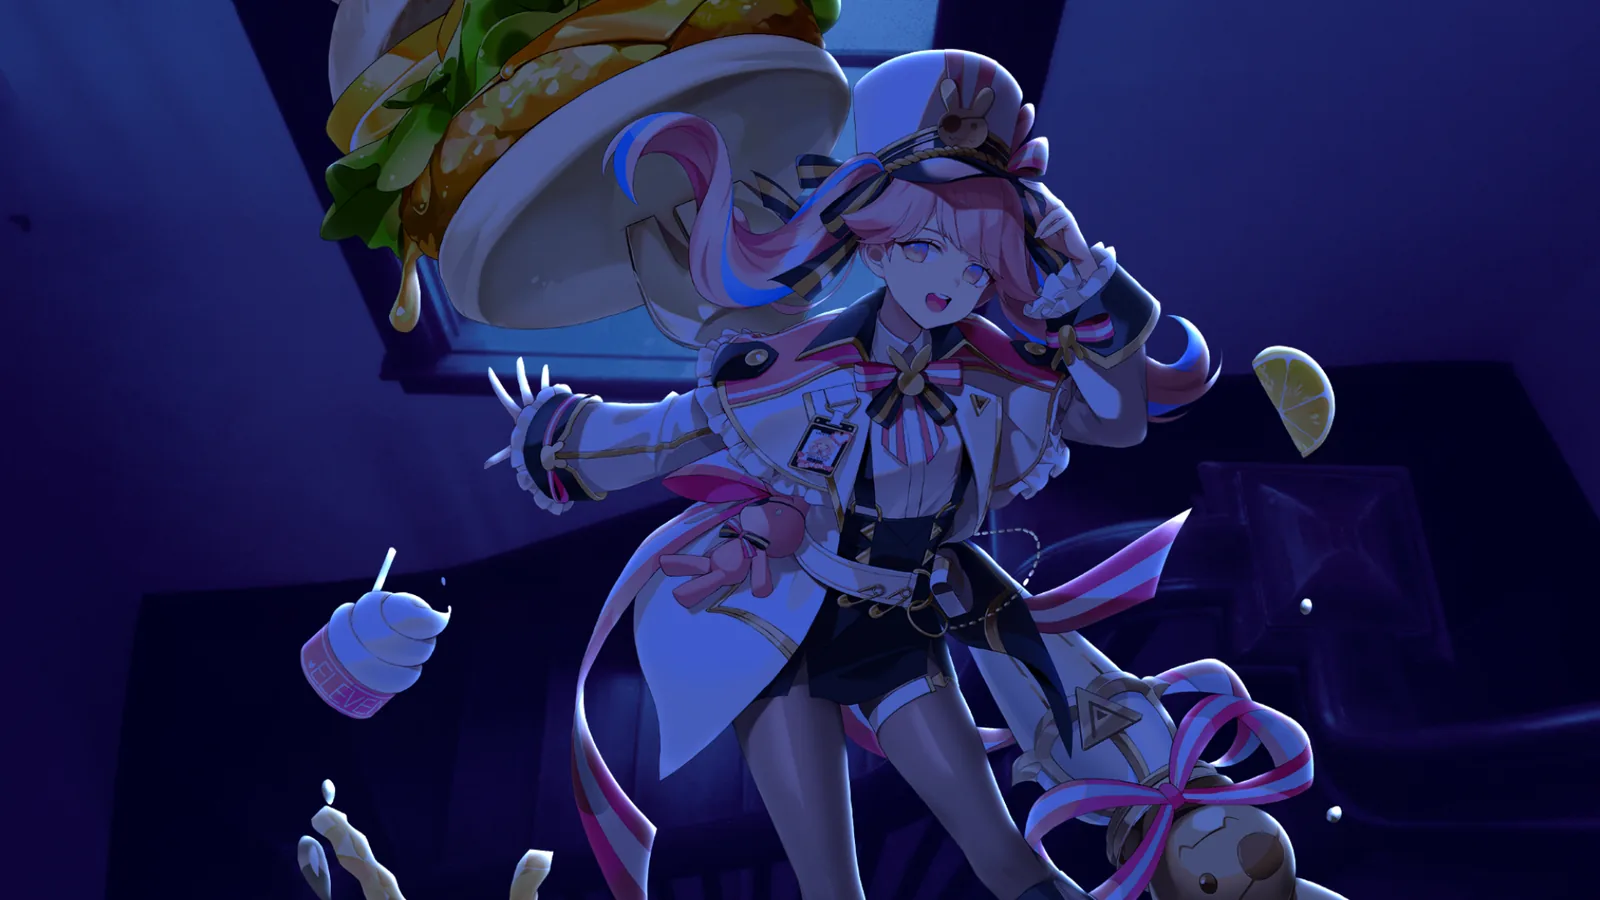 원본Original元の画像Fe_AutoGrade